Most editing programs allow you to convert colour images into black and white via grayscale conversion. But this does not always give the best results. As in black and white film photography where it is necessary to use filters to get good results, we need to apply the equivalent of lens filters in digital photography. The conversion techniques range from the very simple to complex. The techniques described here are base on Photoshop, but other editors will allow you to perform similar actions.
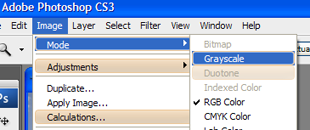
To convert to grayscale in Photoshop, you switch the mode under image, from RGB Color to Grayscale.
An image consists of pixels that record colour, each pixel is made of the combination of three colours, red, green and blue, the value of the colour range from 0 to 255, which are often expressed as an percentage. Each of these colours are the channels you view via Photoshop. When each of channels are viewed in Photoshop, the image is shown in B&W and when channels are combined, they produce the colour image.
An image consists of pixels that record colour, each pixel is made of the combination of three colours, red, green and blue, the value of the colour range from 0 to 255, which are often expressed as an percentage. Each of these colours are the channels you view via Photoshop. When each of channels are viewed in Photoshop, the image is shown in B&W and when channels are combined, they produce the colour image.
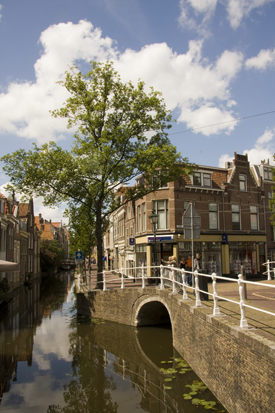
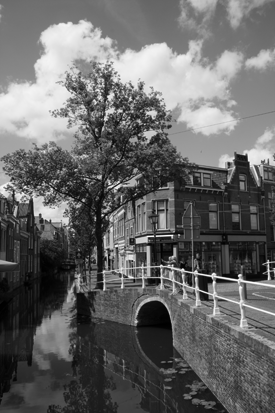
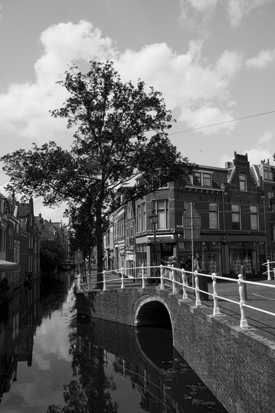
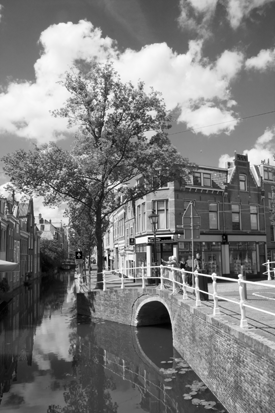
Using Editing tools like Photoshop, you can convert the image to a greyscale but this may not give you the effects you want. The colour image of a Delft canal below was converted to B/W by changing the Mode to Grayscale in Photoshop CS.
The water in the canal is a little too dark and so is the building to the rear. This is the simplest of techniques but does result in loss of data.
With Photoshop you have other options, from the palette window you display a pop menu that will allow you to split the image into its three channels. This will create three B & W images but again this may not give you the best results.

The red channel

The green channel
The blue channel
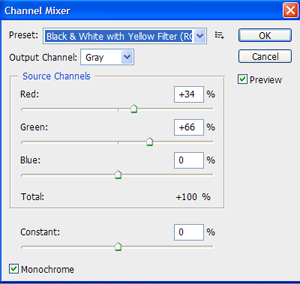
In Photoshop by using the channel mixer, (under image -> adjustments -> channel mixer) you can merge all three channels into one grayscale image. You control the percentage of each of the channels and it is not necessary for all the percentages to sum to 100.
Thus channel mixer gives you the more control over the conversion and allows you to give emphasize to the areas of the image that view as important.
The constant will move the histogram to either the left or the right, ie making the image lighter or darker. A positive percentage makes the darker. You can also set negative % in any of the channels.
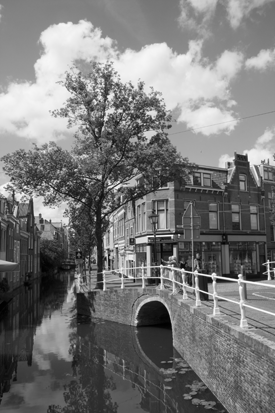
The image below is produced with 34% red and 66 % green and 0% blue.
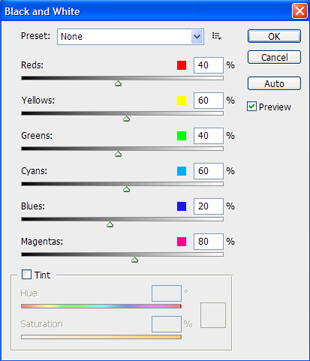
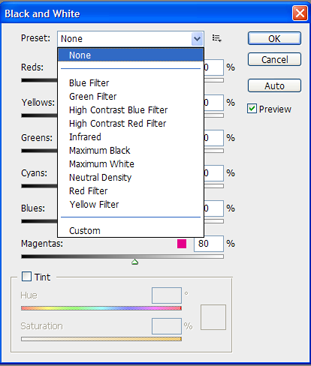
In Photoshop CS3, Adobe have introduced a new set of image presets for the conversion of colour images to B & W.
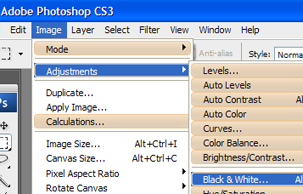
You can find this dialog via the Adjustments menu available under Image -> Adjustments The black and white dialog, allows you set the percentage of six colours Reds, Yellows, Greens, Cyans, Blues and Magentas.Again the values do not have to add up to 100%. There are also two optional tints, Hue and Saturation. Photoshop CS3 comes with 10 preset filters.
The value for each colour can range between -200% and 200%.
The image below was produced using the High Contrast Red Filter of the Black and White dialog.
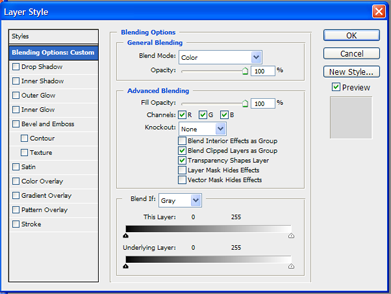
In order to use this option, you need to create a copy of the default (background) layer. Via the layer option you select the blend options. Select the blend Mode to color and click OK.
For this layer set the saturation to -100%. Switch back to the background layer and adust the Hue and Saturation for this layer to change the contrast in the image.
The image below was produced with a Hue of -29% and Saturation of +34.

An important tip is to convert the image from 8 bit to 16 bit before doing the conversion from colour to black and white. As the colour to black and white conversion involves integer arithmetic, working on a 16 bit image means that adjacent pixels will have difference tones where as in a 8 bit image the adjacent pixel will be the same tone.